
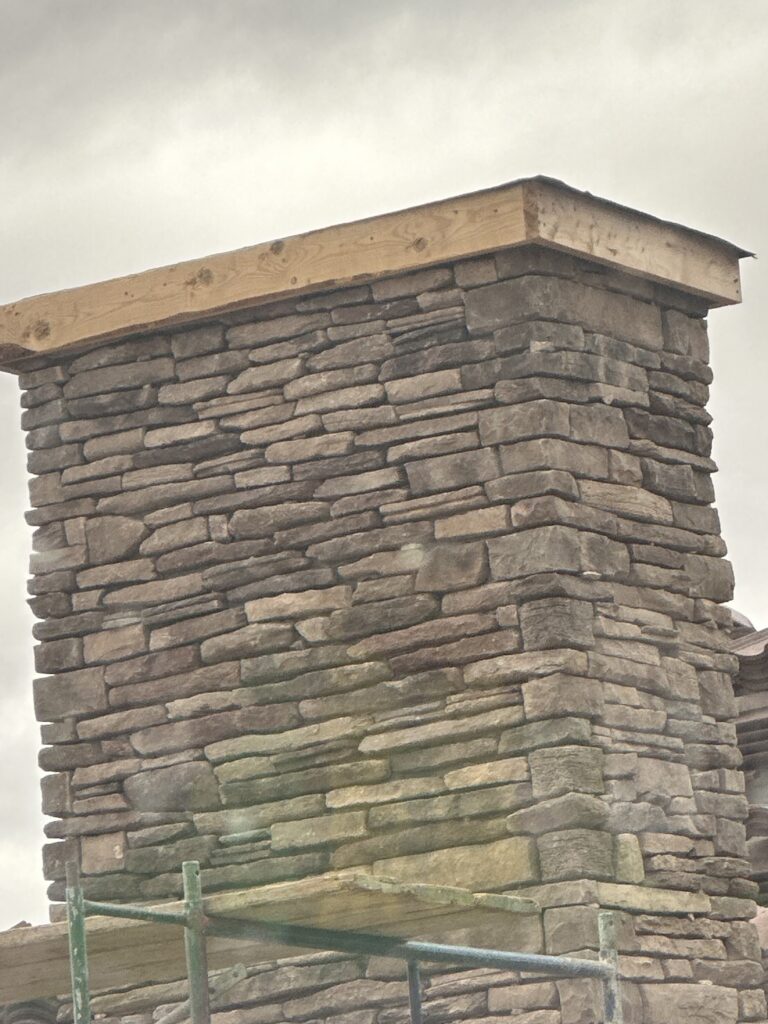
Stone Veneer Installation in Phoenix: Materials and Moisture
Almost every veneer failure looks fine from the street until a stain appears, a stone sounds hollow, or one unit comes off with a clean mortar pad attached. In Arizona, the stone itself is rarely the problem. What matters is the wall behind it, how the veneer is supported, and how water is allowed to leave.
A veneer is a facing, not a structural wall. It carries its own weight, but it does not hold up the roof, retain soil, or stiffen the structure behind it.
Because it is a masonry facing, it will absorb some water and allow some water behind it. A good installation assumes that will happen and gives that water a reliable path back out.
Natural Stone vs. Manufactured Stone in Arizona
Natural Stone
Quarried stone is cut or split to veneer thickness. It is heavier, more variable in color and texture, and generally more stable in long-term UV exposure because the color is inherent to the mineral itself.
- Heavier and sometimes requires structural support.
- More fitting and wet-saw work.
- Very stable color in Arizona sun.
- Repair matching can be easier if the same stone source remains available.
Manufactured Stone
Manufactured stone is a cast concrete product molded from real stone forms and colored with pigments. It is lighter, more consistent, and often faster to install.
- Lighter and commonly suited to adhered veneer assemblies.
- Consistent shapes and premade corner pieces.
- Color can soften over time on heavily exposed elevations.
- Repair matching depends on the profile still being manufactured.
| Factor | Natural Stone | Manufactured Stone | What It Means in Phoenix |
|---|---|---|---|
| Weight | Heavier, often needs a ledge or footing | Lighter, usually within adhered-veneer limits | Weight determines whether the wall needs structural support below |
| Cost Drivers | Material cost and labor to fit irregular pieces | Lower material cost and faster setting | Tight hand-fit patterns can narrow the labor difference |
| Color | Naturally varied | Consistent within a production run | Natural variation looks authentic; consistency can help future matching |
| UV Exposure | Mineral color is very stable | Pigment can soften over many years | South and west walls take the hardest exposure |
| Repairability | Individual units can be reset and sourced | Depends on product availability | Discontinued profiles are a common repair challenge |
Adhered Veneer vs. Anchored Veneer
Adhered Veneer
Adhered veneer is bonded to a prepared wall with mortar. It is common for manufactured stone and thin-cut natural stone.
The system depends on proper substrate preparation, full mortar coverage, and staying within weight and thickness limits.
Anchored Veneer
Anchored veneer is heavier stone supported on a ledge or footing and tied back to the structure with corrosion-resistant anchors.
It behaves more like a masonry wythe and is the correct approach for full-thickness stone and larger supported elevations.
Heavy stone installed as if it were light stone is a predictable failure. If the weight is not supported by a ledge or footing, it is hanging on the bond line.
The Substrate Decides the Installation Method
Clean, sound, untreated block is an excellent substrate. Painted or sealed block needs proper preparation because coatings break the bond.
Strong but smooth. It usually needs roughening or bonding preparation so the setting bed has something to grip.
Needs the full assembly: weather-resistive barrier, drainage plane, lath, scratch coat, then veneer.
Sound, unpainted stucco over lath may work. Hollow, cracked, delaminating, or painted stucco needs to be addressed first.
Possible only for lightweight interior products and within the wall’s allowable load.
Spalling block or failed mortar joints should be repaired before veneer is added. Covering the problem only hides it temporarily.
The Layers Behind the Stone
On a framed wall, a correct veneer assembly is a stack of layers. Each one has a specific job.
Weather-Resistive Barrier
Controls water and directs it downward instead of into the wall.
Drainage Plane
Creates a path for water behind the veneer to move down and escape.
Lath
Corrosion-resistant lath is fastened into framing and supports the scratch coat.
Scratch Coat
A scored mortar bed that cures before stone is installed.
Setting Bed + Stone
Mortar is applied for full contact and the stone is pressed into place without voids.
Stone set directly onto sheathing or foam with no drainage plane, no lath, and no scratch coat can look perfect on day one and still fail predictably years later.
Weep Screeds, Clearances, and Grade
The Bottom of the Wall Is Where Water Problems Start
Veneer needs a way to drain at the base. That means a weep screed or equivalent termination and enough clearance above soil or paving to keep the drainage path open.
Running veneer into dirt for a buried look is one of the fastest ways to turn the bottom courses into a moisture wick.
When one horizontal stripe of stone is discolored and the courses above and below are clean, the cause is often irrigation. Fixing the water source is part of the masonry repair.
Mortar Joints: Grouted vs. Dry Stack
Grouted Joints
Mortar fills the spaces between stones and is tooled to a profile. A well-compacted joint is more forgiving and sheds water more effectively on exposed exterior walls.
Dry Stack
Stone is set tight with no visible joint. The look is clean, but the installation is less forgiving because every setting-bed and termination detail must be right.
Installing Veneer in Phoenix Heat
Open Time Shrinks
Mortar skins over quickly on hot, dry, breezy days, so stone must be set before the bond surface dries.
Substrate Suction Increases
Hot block can pull moisture out of mortar too quickly, so controlled pre-wetting may be necessary.
Batch Sizes Get Smaller
Smaller fresh batches perform better than retempering stiff mortar with extra water.
Curing Matters
Shade and moisture retention help mortar cure instead of simply drying out.
Work Timing Changes
Exposed elevations may be handled early, with shaded elevations scheduled later in the day.
Schedule Affects Quality
Summer production cannot be treated exactly like spring production if bond strength is the priority.
What We See Go Wrong on Veneer Installed by Others
Before quoting a veneer repair, we tap the wall. A tight, fully bedded stone sounds dull. A hollow-set stone rings. That quick test often tells us whether the issue is isolated or built into the whole assembly.
Veneer on Outdoor Living Features
BBQ Islands
Need a properly built core, heat-aware detailing, and a substrate that can carry the finish.
Outdoor Fireplaces
Bring heat and code considerations that ordinary decorative veneer does not.
Planters
Have wet soil permanently on one side, so drainage and waterproofing cannot be an afterthought.
Seat Walls
Need cap and flashing details that keep water from entering from above.
Columns and Pilasters
Often fail where hose bibs or irrigation repeatedly wet the same face.
Pool Surrounds
See splash-out and pool chemistry regularly, which can accelerate salt movement through masonry.
Repairing and Matching Existing Veneer
Spot Repair Is Often Enough
- Remove the loose stone cleanly.
- Cut the old bed back to sound material.
- Find and correct the water source.
- Reset with full mortar coverage.
- Match the existing joint profile.
Matching Is the Hard Part
- Manufactured profiles get discontinued.
- Natural stone varies between quarry runs.
- Sun exposure changes color over time.
- Mortar color matters as much as stone color.
New Era Masonry offers masonry color matching for repairs where the replacement stone and mortar need to blend into an older weathered wall.
When You Do Not Need a Full Re-Veneer
If the assembly behind the stone is sound and only a few units are loose, spot resetting plus correcting the water source is usually the right repair. If the problem is only surface efflorescence, cleaning and an irrigation correction may be enough.
Full removal and rebuild belongs to walls where the drainage plane, lath, scratch coat, or support details were never installed properly in the first place.
What Drives the Cost of a Veneer Installation
Read a bid by what it includes, not just by the number at the bottom. Two proposals can be far apart because one is planning to build the full assembly and the other is planning only to set stone.
What a Real Quote Should Include
- Specific stone product, profile, color, and corner-piece count.
- Substrate preparation listed layer by layer.
- Whether the veneer is adhered or anchored.
- How the weight is supported.
- Weep screed, grade clearance, and flashing details.
- Mortar type and joint treatment.
- Demolition and disposal scope.
- Cleaning at completion and efflorescence handling.
- License, bonding, and insurance information.
Red Flags in a Cheap Veneer Bid
Frequently Asked Questions
How is stone veneer installed?
On a framed wall, the normal sequence is a weather-resistive barrier and drainage plane, then metal lath, then a scratch coat that is scored and allowed to cure, followed by the setting bed and stone. On clean, untreated block, the barrier and lath steps are usually not required and the scratch coat can go directly over prepared masonry.
Can stone veneer be installed over stucco?
Sometimes. Sound, unpainted stucco over lath can work. Hollow, cracked, delaminating, or painted stucco should be removed or repaired before veneer is added.
Can stone veneer go directly over block?
Yes. Clean, untreated, structurally sound block is one of the best substrates for adhered veneer. Paint, sealers, spalling units, or failing mortar should be corrected first.
Can I install stone veneer on drywall?
Lightweight interior veneer can be installed over properly prepared drywall where product weight limits and wall capacity allow. Drywall is not an acceptable substrate for exterior or wet-area veneer.
How long does stone veneer last in the Arizona sun?
A properly built assembly can last a very long time. Sun may change the tone of some manufactured products over many years, but water at the base of the wall is a much more common cause of failure.
Why is there white powder on my stone veneer?
That is usually efflorescence: salts carried to the surface by moisture moving through the masonry. Cleaning removes the visible deposit, but the moisture source has to be corrected or it will return.
What is the difference between natural and manufactured stone veneer?
Natural stone is quarried rock cut to veneer thickness. Manufactured stone is pigmented cast concrete molded from real stone. Natural stone is heavier and more naturally color-stable; manufactured stone is lighter, more consistent, and easier to fit.
Can loose or missing stones be repaired without redoing the whole wall?
Usually yes. Isolated loose stones can be reset after the old bed is removed back to sound material and the cause of the failure is corrected. Full removal is reserved for walls with assembly-wide problems.
Talk to a Masonry Contractor Who Builds the Whole Assembly
New Era Masonry is a licensed, bonded, and insured masonry contractor serving Phoenix, Gilbert, Mesa, Scottsdale, Paradise Valley, and surrounding Valley communities. The company is ROC #339091 and brings more than forty years of trade experience across three generations.
Whether you are adding stone veneer, wrapping an outdoor living feature, or trying to understand why an existing wall is staining or releasing stones, the right starting point is identifying what is happening behind the finish.
Planning Stone Veneer or Repairing a Failing Wall?
New Era Masonry can evaluate the substrate, support, drainage details, existing damage, and matching requirements before the veneer scope is finalized.
Request a Site Evaluation View Masonry Repairs